- Difficulty Difficult
- Time 3.5 hours
- One-Way 6.1km
- Elevation Gain 1150 meters
- Season July - September
- Camping No
- From Vancouver 2 hours
- Public Transit No
- Dog Friendly No
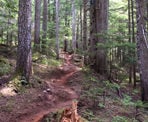
The Ascent Trail is a steep hiking trail that starts from the base of Blackcomb Mountain and ends at the top next to the Rendezvous Lodge. The trail is a good workout yet the route has been built in such a way that you sometimes forget that you are hiking next to ski slopes. The trail passes through scenic forested sections, crosses bridges over small creeks, and meanders up ski hills with incredible views of the Whistler area below.
The trail is generally hiked from the bottom to the top and then you can take the chairlift back down. However, if you do not have a seaon's pass, you MUST purchase an Ascent Trail Download ticket from Guest Services before you hike up the mountain. Make sure that you check the operating schedule of the Solar Coaster Express and Wizard Chairlifts before hiking to the top as they close at different times throughout the season.
There are three sections to the Ascent Trail:
- Little Burn
- Distance: 700m
- Elevation: 64m
- Big Burn
- Distance: 2.2km
- Elevation: 478m
- Heart Burn
- Distance: 3.0km
- Elevation: 608m
Some hikers choose to hike the first two sections to where the top of the Wizard Chairlift meets the bottom of the Solar Coaster Express Chairlift. At this point, you can take a chairlift back down or take a chairlift up to the top and not hike the third section. If you plan to take the chairlift up the third section, you will need to purchase a different ticket before you begin the hike.
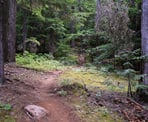
From the base of Blackcomb Mountain, the trailhead is located just up the hill, to the right of the Wizard Chairlift where a large wooden overhang stands at the entrance to the forest. Follow the trail as is gently climbs, crossing small bridges and weaving through the forest area. The trail exits the forest and then climbs a steep, gravel path before entering the forest again. Continue following the well market route until it, again, exits the forest and follows a gravel path up to a sign marking the start of Big Burn.
Begin hiking up the second section of trail as you quickly gain elevation and realize why it's called Big Burn. Cross a gravel road and continue into the forest, following the trail. This section of forest is quite long and climbs up several steep sets of wooden stairs before, eventually, reaching another gravel road.
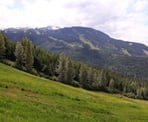
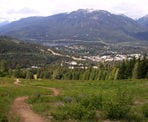
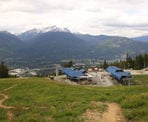
Cross the gravel road and follow the worn trail up the ski run as it zig-zags back and forth. Make sure to stop and look back at the incredible view of the Whistler area behind you. During the mid-summer months, the wildflowers often grow on the ski runs, making for a very colourful display as you admire the views.
The trail enters back into the forest and continues its steep ascent, making its way up several more sets of wooden stairs. Eventually, you exit the forest and arrive next to the Wizard and Solar Coaster Express chairlifts. At this point you have to decide whether you will be hiking the third section.
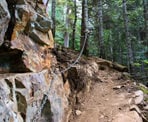
The Heart Burn section is the longest and gains the most elevation, however it passes through a series of long switchbacks and has fewer stairs than the Big Burn section. Follow the trail as it climbs through the ski run, following the path towards the chairlift, before veering right. The trail enters the forest and immediately climbs up a large set of stairs before, again, veering right and then beginning a series of gradual switchbacks. Take advantage and enjoy the views when the trails briefly leaves the forest areas.
As you continue to feel the burn on your legs, the trail pretty much has similar views, until you hike up a small ravine and arrive next to a kids castle with slides. This play area is only used in the winter though as the slides have a long drop where there would normally be snow. Continue hiking up the hill and walk through a small tunnel. The trail continues a bit further to another gravel road.
Cross the gravel road and begin ascending the final forested section. This section of trail has some fairly steep sections however, occasional glimpses of the Peak 2 Peak Gondola can be seen through the trees, offering relief that the end is near. The trail reaches a point where it exits the forest and then follows signs up to the Rendezvous Lodge.
How to get to Ascent Trail
Estimated Driving Time from Vancouver
2 hours
The Ascent Trail is located on Blackcomb Mountain and starts from the Blackcomb Village area and ends at the Rendezvous Lodge.
If you are not staying in the Whistler area, the best place for day parking for this hike is in Parking Lot 6 near Blackcomb. However, Parking Lot 6 is actually located at the top of the first section of the Ascent Trail and you will have to hike down about 800m to guest services to purchase a ticket before you hike to the top. Also, when you return via the chairlift after your hike, you will have to hike the first section back up to Parking Lot 6.
Driving from Vancouver, drive to Highway #1 and and head West, passing through the North Shore towards Horseshoe Bay. Merge onto Highway #99: The Sea To Sky Highway and follow the scenic highway north through Squamish until you eventually arrive in Whistler.
Turn right towards the Upper Village, turning off of Highway 99 and onto Lorimer Road. Continue straight through the intersection with Blackcomb Way until you reach a second intersection with Blackcomb Way and then turn right. Watch for signs pointing to the direction to Parking Lot 6. Turn left onto Glacier Way and drive to the top, going straight through the intersection until you see the gravel lot.
Make sure to park in a designated area as some of the parking spaces are for buses only.
View a map of Driving directions to Ascent Trail.

Although we try to keep information as current as possible, www.vancouvertrails.com makes no warranty or representation as to the availability, quality, fitness for purpose, conditions or accuracy of the information provided with respect to this trail or trails. The information provided herein is further subject to our Terms of Use.

Comments
Add Comment View All Comments